
HMDIA Login & Registration lets you create and manage custom Login, Registration, Password Reset and Account pages using WordPress user accounts.
After activating the plugin for the first time, the Setup Wizard guides you through the essential configuration. You can also skip the wizard and configure everything manually from the HMDIA settings.
From your WordPress dashboard:
On a fresh installation, activating the plugin opens the Setup Wizard automatically.
If you already have the plugin ZIP file:
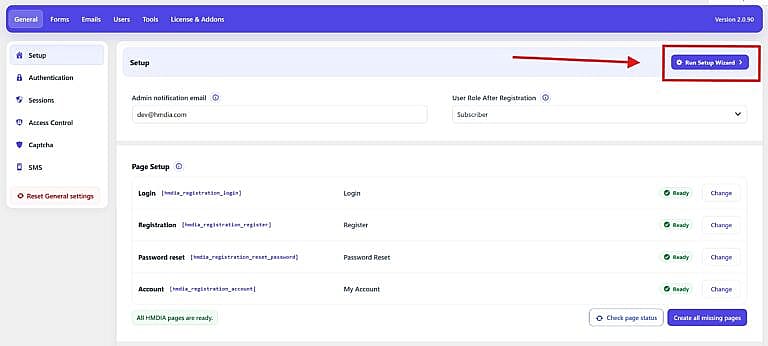
The wizard configures the essential Free features of the plugin. More advanced authentication and security options can be configured later from the HMDIA dashboard.
You can click Skip setup at any time if you prefer to configure the plugin manually.
Skipping the wizard does not disable the plugin. You can open it again later from:
HMDIA → General → Setup → Run Setup Wizard
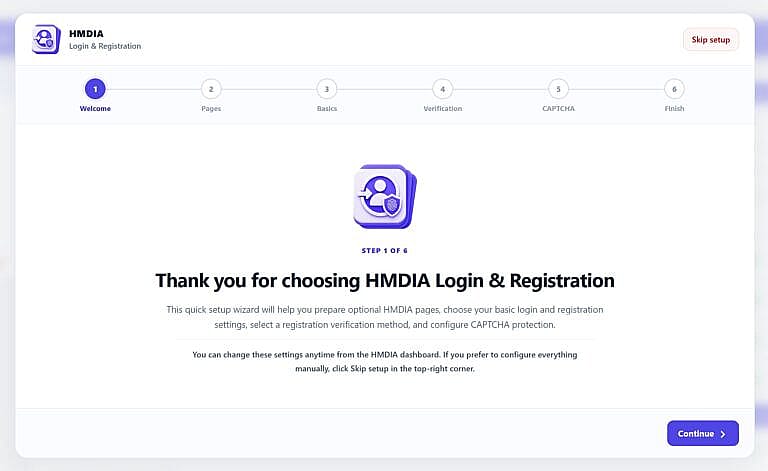
The first screen introduces the Setup Wizard and the settings it will help you configure.
The wizard can:
Click Continue to start.
If you prefer to configure everything manually, click Skip setup in the top-right corner.
All wizard settings can be changed later from the HMDIA dashboard.
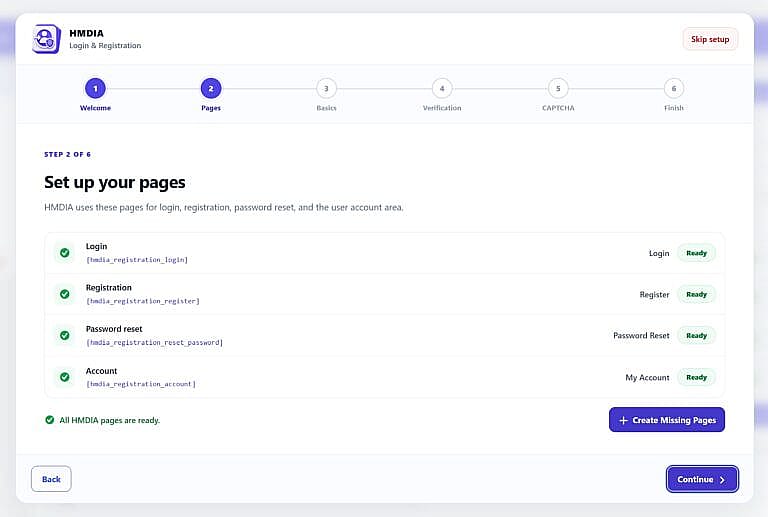
Each page displays either Ready or Missing.
The page exists, is published and is recognized by HMDIA.
The required page is not currently available.
Click Create Missing Pages to automatically create and publish the missing HMDIA pages.
If all four pages are available, you will see:
All HMDIA pages are ready.
Click Continue when finished.
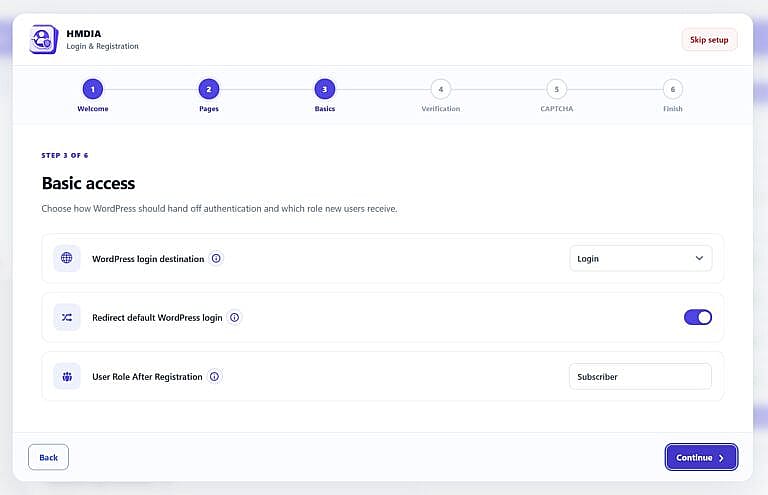
This step controls how the standard WordPress login is handled and which WordPress role new HMDIA users receive.
Choose the main page visitors should use to sign in to your website.
For most websites, select the HMDIA Login page created in the previous step.
The selected destination must be available before the WordPress login redirect can be enabled.
If HMDIA does not detect its Login shortcode on the selected page, the wizard warns you to make sure that page still provides a valid sign-in form or link.
Enable this option to redirect normal visits to the standard WordPress login screen to your selected login destination.
This applies to normal wp-login.php access and logged-out administrator sign-ins.
Registration and password reset remain separate and are not redirected by this setting.
Choose the WordPress role assigned to users who create an account through the HMDIA Registration form.
For a standard membership or customer account, Subscriber is usually the appropriate choice.
The available choices are based on the WordPress roles currently registered on your website.
Click Continue when finished.
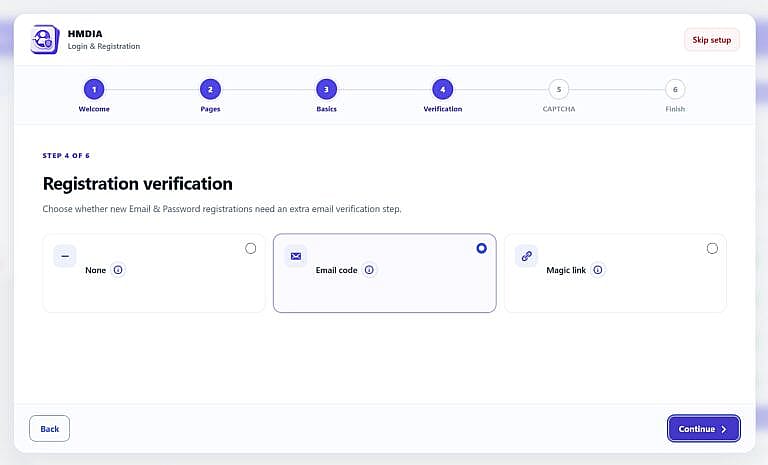
Choose whether users registering with the Email & Password registration method must verify their email address.
Three options are available.
The account is created immediately after successful registration without an additional email verification step.
HMDIA sends a one-time verification code to the user’s email address.
The user must enter the code to verify the email address.
HMDIA sends a secure verification link to the user’s email address.
The user verifies the address by clicking the link.
The Setup Wizard only changes verification for the standard Email & Password registration method.
If your site is already using an advanced Pro registration method such as Passwordless or Phone registration, the wizard preserves that configuration instead of replacing it.
Advanced registration verification can be managed under:
HMDIA → General → Authentication
Click Continue after choosing your verification method.
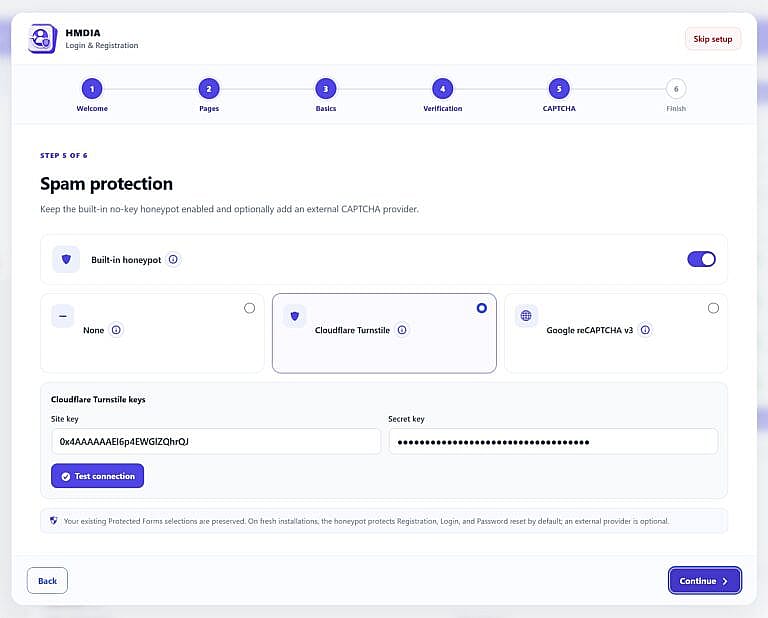
The Spam Protection step lets you enable HMDIA’s built-in honeypot and optionally connect an external CAPTCHA provider.
The built-in honeypot is an invisible bot trap that does not require:
On fresh installations, the honeypot protects these HMDIA forms by default:
The wizard preserves any existing Protected Forms selections if the plugin has already been configured.
An external CAPTCHA provider is optional.
Choose from:
No external CAPTCHA service is used.
The built-in honeypot can still remain enabled.
Adds Cloudflare Turnstile bot verification.
Enter your:
Then click Test connection.
Adds Google’s score-based invisible reCAPTCHA verification.
Enter your:
Then click Test connection.
Both the Site key and Secret key are required before the selected external provider can be enabled.
Click Continue when your spam protection settings are ready.
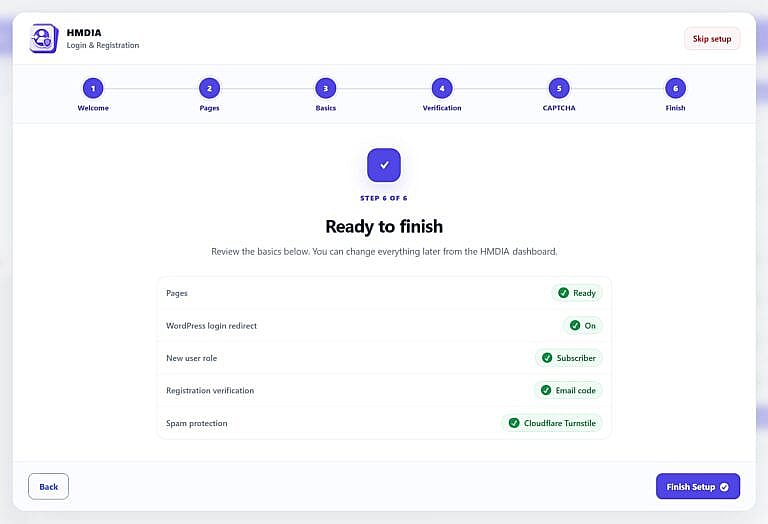
The final step gives you a summary of the main settings selected during the wizard.
It reviews:
Shows whether the required HMDIA pages are ready.
Shows whether the default WordPress login redirect is On or Off.
Shows the WordPress role that will be assigned to new registrations.
Shows the selected verification method:
Shows the active protection option, such as:
Use Back if you need to change anything.
When everything is correct, click Finish Setup.
After setup is completed, HMDIA takes you to the main plugin settings.
The Setup Wizard configures the essential settings needed to get started, but HMDIA includes additional options throughout the plugin.
The main administration areas are:
General
Configure setup, authentication, sessions, access control, CAPTCHA and SMS.
Forms
Customize your Login, Registration, Password Reset, Account and other supported forms.
Emails
Configure email notifications and email templates.
Users
Manage HMDIA-related user information and account activity.
Tools
Access plugin maintenance and diagnostic tools.
License & Addons
Manage Pro licensing and supported HMDIA extensions.
Nothing configured in the Setup Wizard is permanent.
You can change the same settings later from the corresponding HMDIA sections.
For example:
You can also run the Setup Wizard again from:
HMDIA → General → Setup → Run Setup Wizard
This makes the wizard useful both for first-time configuration and for reviewing the site’s basic HMDIA setup later.